Brengun Typhoon
Brengun is a well known manufacturer of various accessories and tools. They have a wide range of resin and photo etched products and now they have upgraded their production with injected plastic aircraft kits. The kit we present here is their Hawker Typhoon in 1/72 scale.
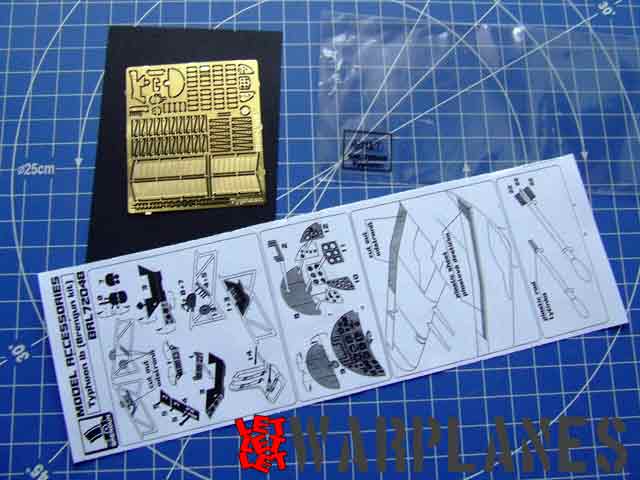
The Hawker Typhoon was released in four different packages and we present here a sample kit of Hawker Typhoon Mk. Ib, stock code BRP72004. The kit features a late version of the machine with bubble canopy. The kit comes in very nice design box with excellent art on the front side and painting instruction at the reverse side. Box content is instruction leaflet, excellent printed decal sheet, transparent parts fret, small etched set (pilot belts and foot step) and three frets with injected plastic parts. Brengun has released an etched upgrade set, stock code BRL72048 and it includes details for the interior, landing flaps and missile details. Both of them, aircraft kit as well accessory set, is included here in this build review.
First impression shows that parts are precisely molded with very little flash on some parts. One of the elements on the parts is ejection pins but this does not present any problem in work. I painted a first coat of Interior grey green and after that add some areas in black. From the side frame structure I have removed standard elements and replaced them with etched parts from extra set. The cockpit interior consists of the side tubular frame, rear and front elements, bottom structure, seat, pilot controls and instruments. Not many parts but they are so precisely made and the final look when completed is very authentic.
One of the elements needing to be completed before fuselage assembly is the front cooling radiator. It consists of three parts and they need a bit sanding for perfect match to each other. Before fuselage halves assembly you need to fit the cockpit assembly, radiator and tail wheel. Parts match is good and very little pressure is needed to hold parts during cement drying.
Wing assembly consist of the several parts, one set is for the landing gear boxes and the same wing consist of one bottom part and two top parts. Landing gear interior is very well made with complete interior structure and small parts like high pressure bottles making this section very attractive and detailed. When assembled they need to be cement at the wing bottom. After dry run of the top wing parts, I noted that I needed a bit of sanding of the box surfaces to manage perfect join of the wing elements. Please take a note before wing parts assembly what final variants you need to do. If you’d like to attach the rocket missiles, you need to alter row of holes in order to place rails in after kit assembly. Also, you need to remove plastic flaps and replace them with better detailed etched parts from additional set.
One of the basic kit extras is the additional elements for the rear fuselage. In the case you need to do sample machine with different horizontal tail chord, you need to cut off the tail elements and replace them with the alternative one. This kit also has two types of horizontal tail with chord thickness as the main difference. This kit does not demand much filler for corrections and plastic is very good. I also recommend you carefully study the reference image of the particular airplane you are planning to build as the kit also has parts for guns with removed fairings. The cockpit canopy is two-piece and it allows the cockpit to be open, a feature much preferred by most modelers.
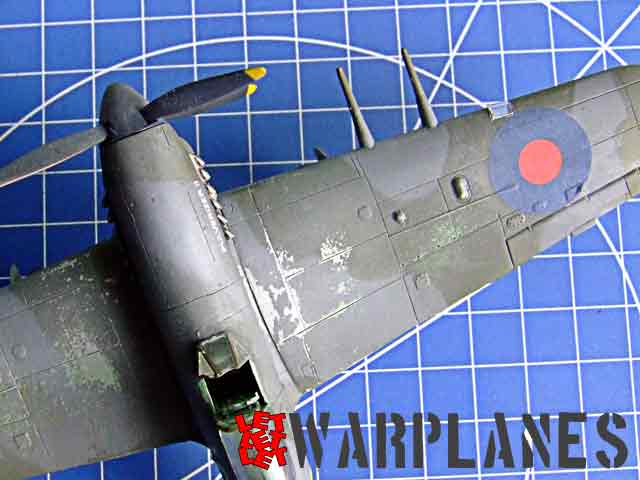
My choice of the final kit fell to the machine 18 P from 440th Canadian Squadron. I had a problem there as one letter in the aircraft registration was not correct and to regret the 18 P letters need to be a bit bolder. As well the basic serial was not correct, I used some freedom and did similar machine from same unit and with same fuselage letters. Basic kit recommend machine with D-Day stripes and the sample I built did not have this markings. Basic camouflage is Dark Green and Ocean Grey at the top with Medium grey at bottom. Airplanes on images show some level of operational weathering and wear-and-tear of the paint so I did the same on the kit.
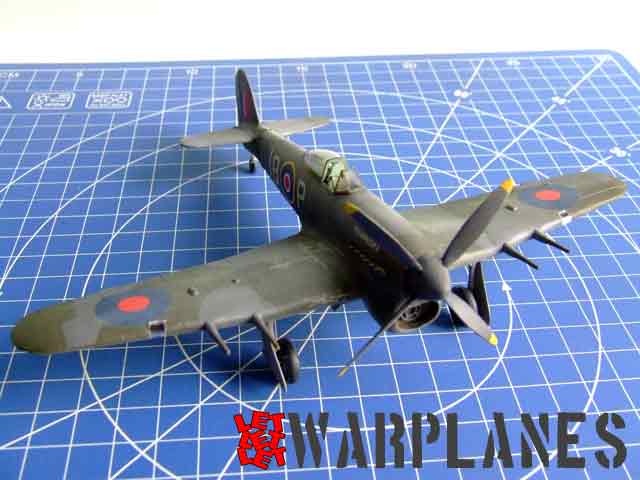
Final assembly included placing of the all transparent parts on the kit and some additional wash of dirt. I am impressed with the kit! Compared with available data and images, it is a very precisely made kit and more or less easy to assemble. A bit of problems with decals are maybe less important when we have accurate kit- the same can be found in spare box, hand painted or replaced with other. With extra etched parts included this Typhoon present excellent choice!!! Kit order here and etched set here!
Big thanks to Brengun team who provided this sample kit.
Srecko Bradic

