The Sweep
The Sweeps is limited edition dual combo release from Eduard with focus on Spitfire Mk.V early history. To know more about it, its recommended to read intro text in assembly booklet about the history of Mk.V version, its very nice to read. At least, this can provide nice technical development info with variants developed. Inside is two plastic kits and stock code number is 11153, scale 1/48.
Box cover art is nice done, with two Spitfire Mk.V in flight, different camouflage, all in nice background made of national insignia and archive photo. All part sets inside are doubled, so there is two transparent frets, as well 14 frets of grey plastic. Alongside comes double pack of pre painted etched parts and protective mask. Decals are provided as separated two of stencils and one large print with unit and national insignia. Not many parts are to be used so care with selections of parts (as well many look similar), should be made. Instruction leaflet is rich, very good explained, start from history and final painting tips. Interesting to note is that there is even ten options for kit painting and two of them are early camouflage pattern, with Dark Earth, Dark Green and Sky at bottom, not so common camouflage for Mk.V.
First step as always is determination what to do, as well parts differ in regard what sample machine is going to be made. After this, I have selects parts, first for the cockpit and start basic painting. Dominative color for cockpit is Grey Green, typical British WW2 interior color, with rear section of cockpit in silver color. Small parts differ in color so some elements are in black color and grey. I notice that parts are art of engineering and look like that it is a bit more easy to assembly then previous kit version, Eduard did some invisible improvements here.
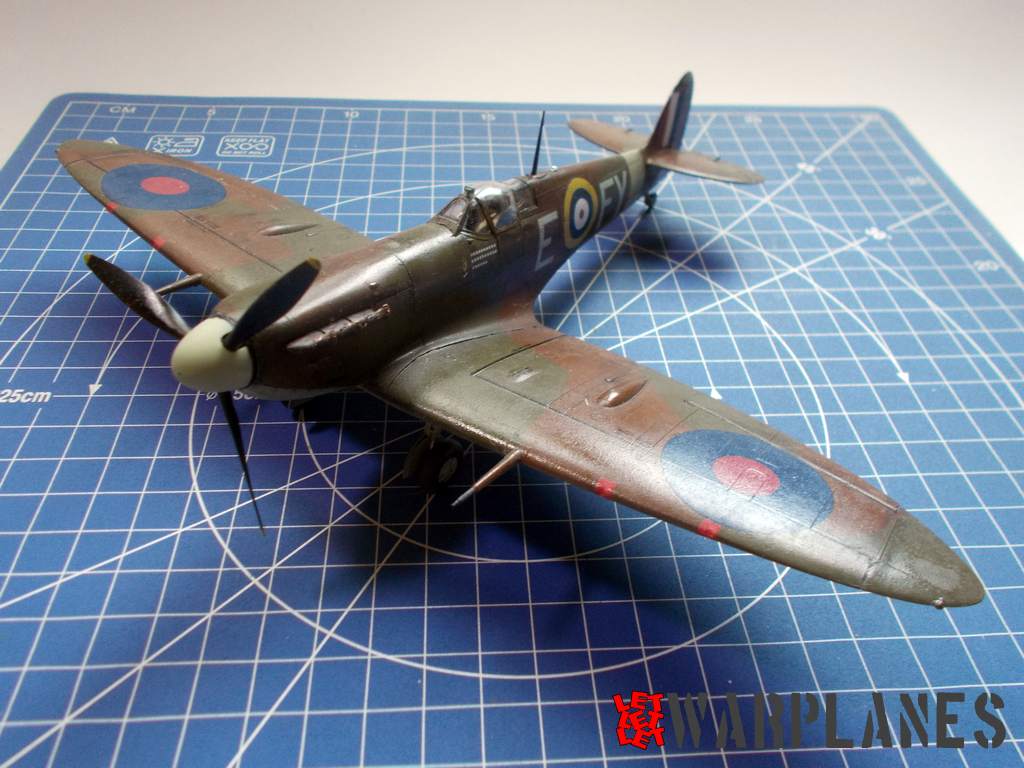
Nice to note is that some sections have few options to be built, like instrument panel, is can be made from original plastic parts, with decal over it for instruments, or with use of etched parts, as I did here in my build. Only step I have skip in this early assembly is placing of gun sight at the top of instrument panel, I did it much later, before closing with wind screen. Gun sight is interesting, it have basic part which goes on instrument panel and on top come the same vision, and it have two options, depends what sample machine is going to be built.
Entire cockpit is assembled as one section and then place inside fuselage half’s. Before do this assembly and join two half’s, there is few small elements to be placed inside cockpit, most of parts are at top of fuselage half’s which are parts of the cockpit interior. Also there is one pressure bottle in cockpit and at rear bottom part need to be cement base for rear wheel. With this all done, fuselage is completed and next to be made are wings.
From very start need to select wing parts for specific sample what is under build, same as for fuselage. Build of wings starts from bottom parts where first need to drill few small holes in outer wing area and then continue with build. All assembly is focused on bottom part, where goes part for wheel bay. Part are detailed and once when complete give nice impression of inner structure. Last step, before cover with top wing section, is to put gun barrels.
Thanks to the excellent quality parts, build goes really smooth. On fuselage need to place with and on rear horizontal stabilizer. Continue to that is add some elements of wing, roll controls and wing tips. There is two type of tips, standard and cliped, very short ones, used for better performances at low height. At bottom goes a lot of external elements and most of them uses etched parts for better details. It is good to paint em separately as well they differ from outer color. Main cooler have options to be open or closed.
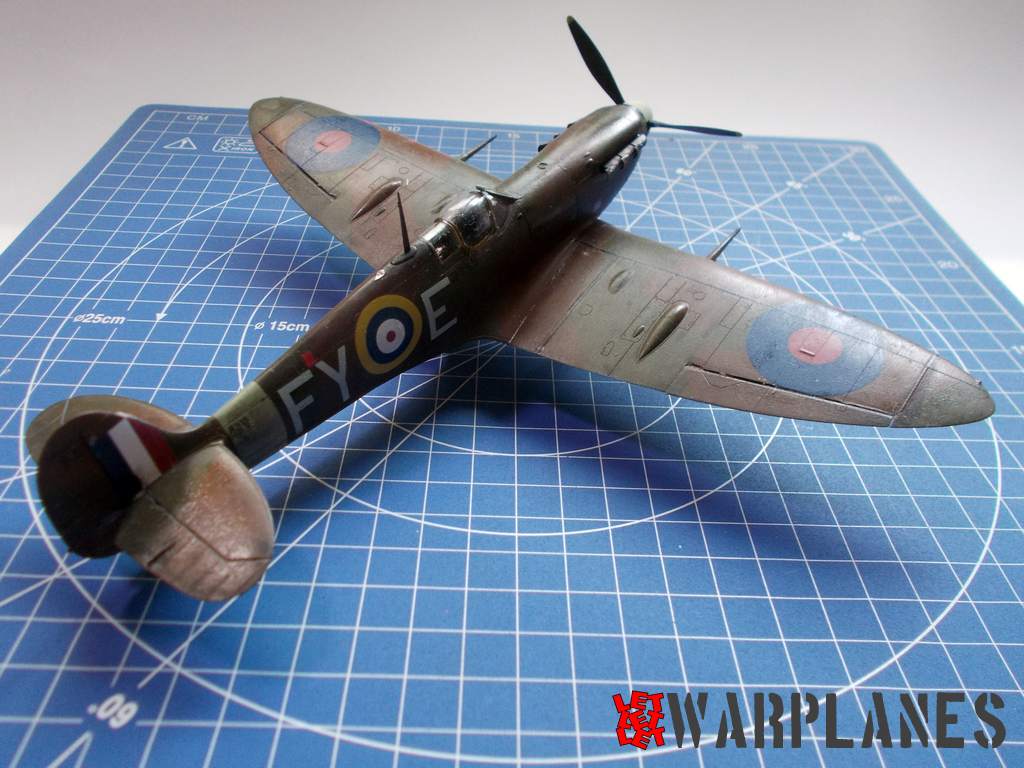
Main wheels are among those who are going to be mount at bottom and you can delayed this step for very end, to place em as completely painted elements. Tire is same in all options only wheel hub differ for various version which is present in kit for final sample. Cannons can be place in this step and cockpit can be put on final works. Cockpit can be open, with side flaps down and can be closed. Different side flaps is provide, depends are you going to make open or closed version.
Elements which really impress me is exhaust stuck. At first glance, it look complicated as well on main pipe need to put three small parts, but it is very easy to do and result is so authentic! This exhausts as well propeller (with optional parts), is best to be places as finished at very end. Propeller have options for different spinners, my sample used short one.
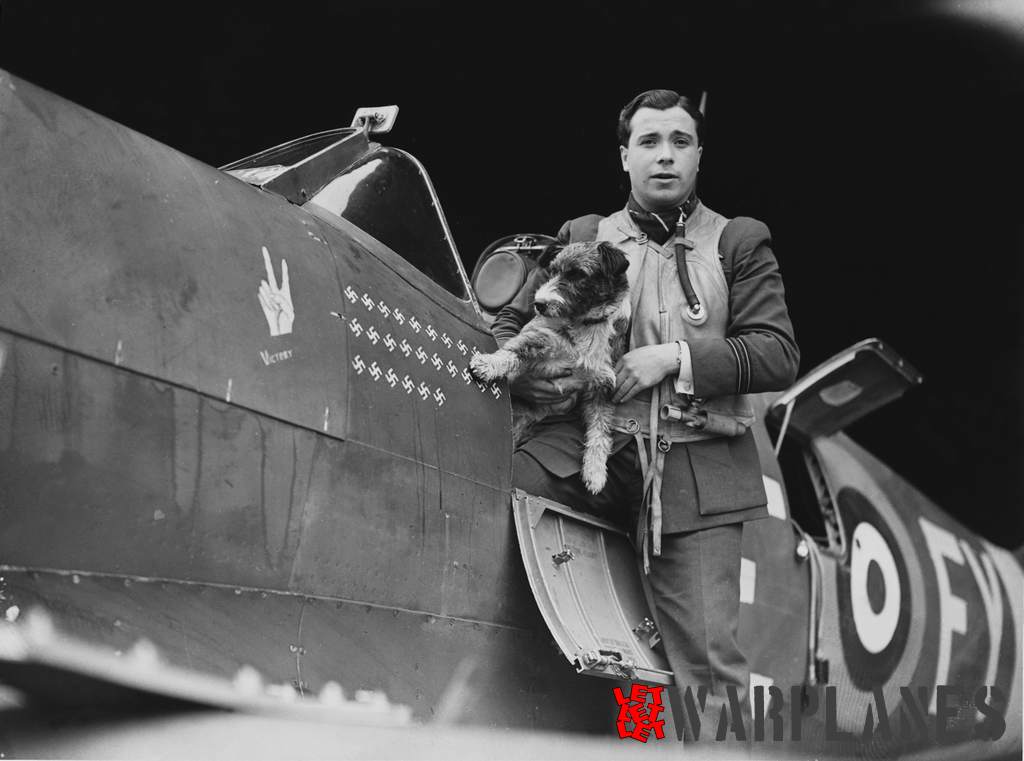
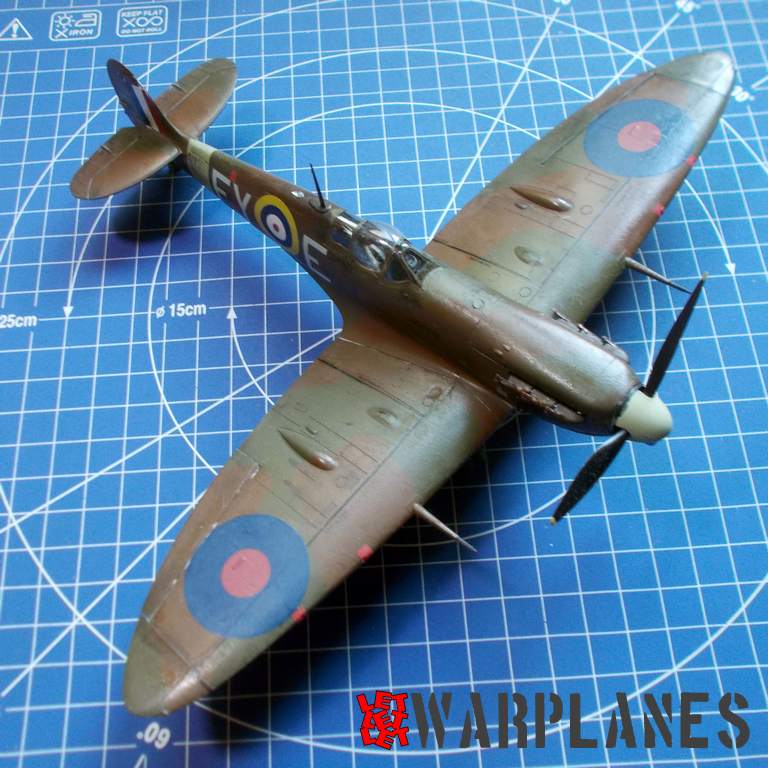
My choice for final build sample is sample machine flown by F/Lt Eric S. Lock, Spitifire Mk.V, W3257, from No. 611 Squadron. He was most successful pilot during the Battle of Britain. Here on photo he is seen with the squadron pet dog in the cockpit of his Spitfire Mk.Vb E-FY W3257 at RAF Hornchurch, 31 July 1941 (KIA 3/8/41). He wears a Luftwaffe Schwimmweste also note his tally of 26 ‘kills’, all made in one year. In this Spitfire took off at 03 August 1941., from RAF Hornchurch and when flying over the Nord Pas de Calais region and saw a group of soldiers and vehicles, he then went to machine gun them, he was never seen again. He had 26 kills to his name. His Spitfire was painted in dal light camouflage with Dark Earth and Dark Green patches at the top and bottom in Sky.
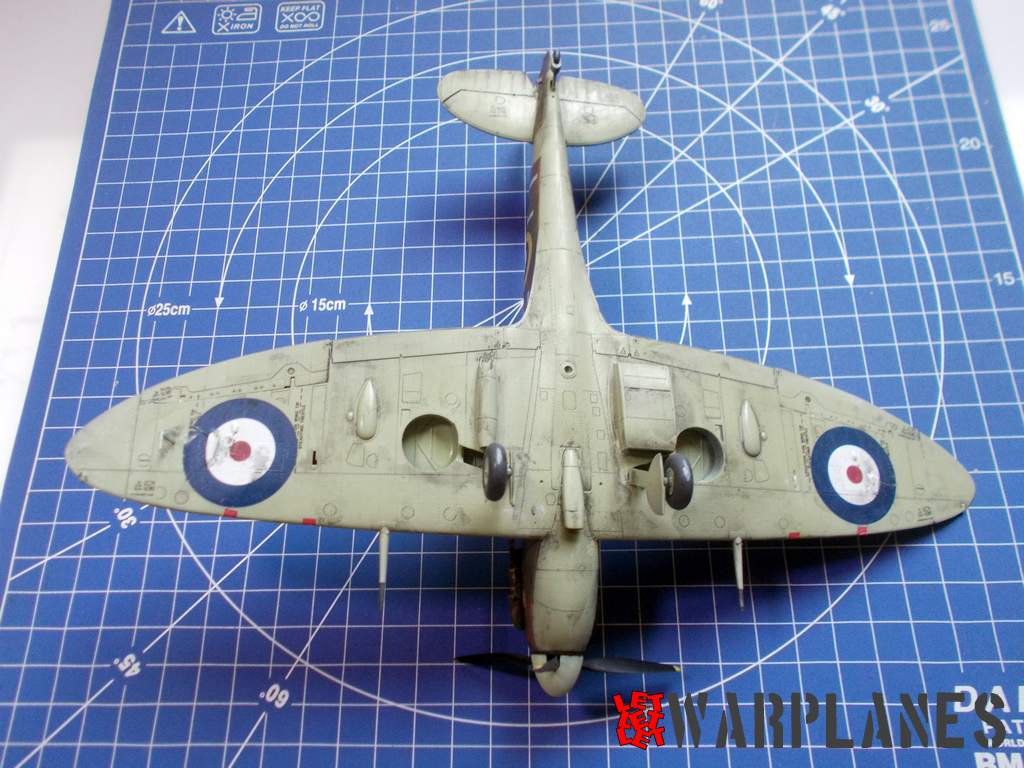
Excellent kit!! I am so impressed with so many external surface details on kit and overall quality of the kit parts. So easy to built and with various options for final finish. Definitely kits worth to have it built it!! Sample kit can be catch here and my thanks goes to Eduard who provide me sample for review.
Srećko Bradić


