Eduard Bf 109F 1/48
Following their excellent line of Bf 109G kits, Eduard has released a new kit of the Bf 109F. It follows the entire assembly and mold design of their Bf 109G kit, with details changed. Eduard released the first kit as a Profi Pack, which is normal in the very start of the production of a new product and alongside with this, deliver an Overtrees version of this kit, just pure plastic in a blank box.
The kit presented here is their kit Bf 109F, stock number 82114. Scale is 1/48, packed in a nicely designed box and with rich content inside. First of all, there is colorful and very detailed instructional leaflet and I recommend you to take a good look at all of it. The kit includes variations of elements to be used, options for cockpit so take care and make plans in advance for what you will build. Basic plastic elements are provided in five plastic frets, one of those is transparent. Two sheets of etched parts provide enough details for the cockpit interior as well as external details and one of them includes already painted elements. As usual, there is a mask to protect elements like the cockpit canopy and two decal sheets, one for markings and other for units and national insignia.
The build start is plagued with one problem, one small element in cockpit was not molded at all (pilot respirator device) so I built it without it (no time to ask for a replacement). Problems like that very rarely occurred and be sure that the manufacturer will help you to solve such a problem. In my case, just a lack of time prevented me to ask and wait for replacement. Apart from this, all other elements are there and they are painted first in RLM 66 color. This is the primary color for the cockpit of the Bf 109F. I have also painted etched parts elements in this paint. What I mostly like is the drop-tank pipe on starboard side of the cockpit, it is in transparent plastic and most is to be painted in yellow and the centre remains unpainted and transparent. There are not so many parts in the cockpit, mostly they are related to cockpit floor, and a few of them are attached to wall sides. One of them is instrument panel.
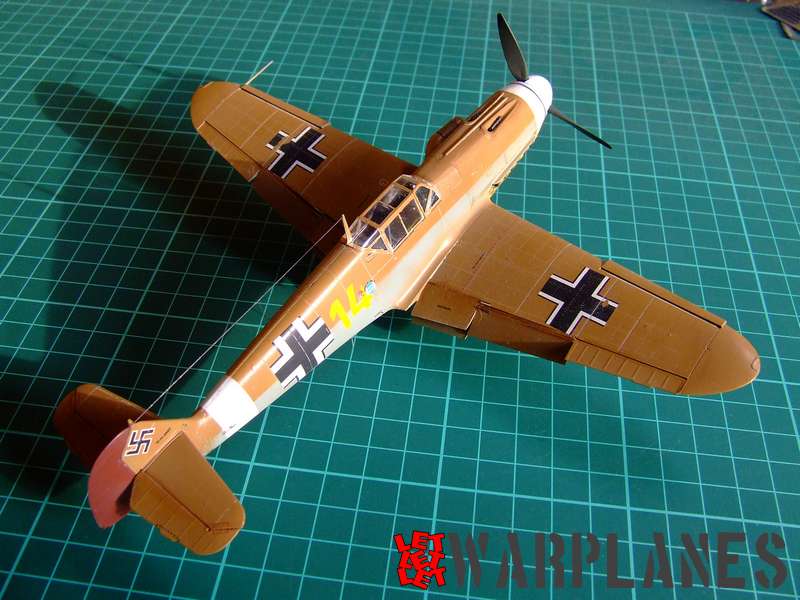
The fuselage consists of two parts with vertical tail (not a feature in Eduard’s Bf 190G kit) and it matches very precisely with cockpit canopy inside. Join line is very precise and in front top of the engine cowling is to be add hinge, which is provided as separate element. On side comes air intake, I used the tropical version since I decided from the very start to make a kit of a machine used in the Africa theatre. I also mounted all tail elements but vertical rudder. Reason for that is that in the version I wanted to finish, vertical rudder is in a completely different color, so far better to make it complete separately and attach at the very end. Wings are simply made, two top halves, one bottom and on bottom you need to place the landing gear boxes. There is also provided points to drill holes, in regards to variants you are building. Wings externally get elements such as flaps and slats as well as coolers under wings. Even in basic plastic, it is very detailed and the elements are so well designed that they set perfectly in place. The whole wing fits under the fuselage and in the front bottom fuselage, engine cowling actually, goes the nose cooler. Flaps and cooler flaps need to set in down position and instruction provide info of angle.
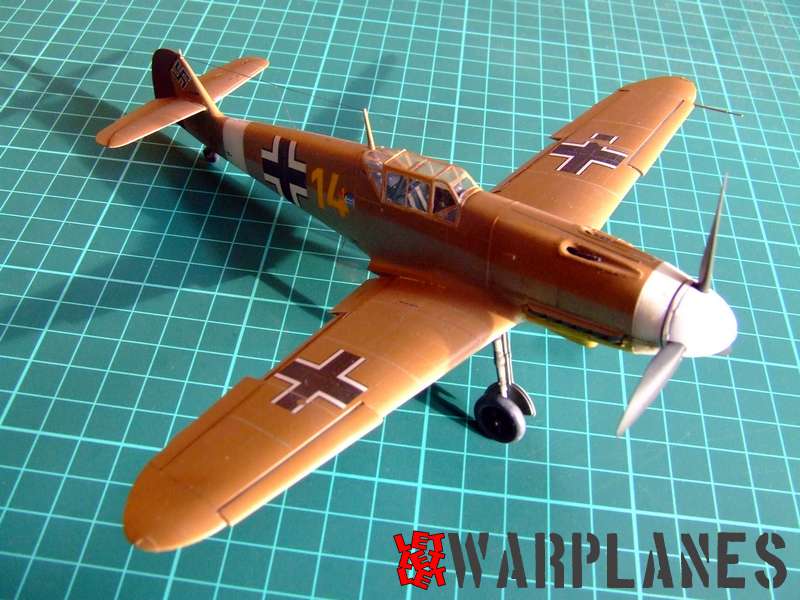
Final works include mounting of landing gear struts, counter weight under the ailerons and placing of the cockpit canopy in place. With this final work, the kit just needed a coat of primer and painting could start. My decision was to make a plane flown by the famous ace, Hans-Joachim Marseille, from JG 27. His airplane was in desert scheme and yellow number 14 on fuselage. This plane is colorful, with red brown vertical rudder, yellow bottom of engine cowling, white band on rear fuselage. Some photos shown yellow 14 with white bottom wing tips–the sample I made did not have it. Basic camouflage is top in Brown color and bottom in Light Blue (basic scheme for Africa). When all basic color were painted, I have gloss coated kit and apply decals. Very interesting to note is that Eduard provided top cross insignia as damaged and it is great feature of the kit (and helps to more easy get into worn out look). This airplane was not extremely dirty and I used a coat of Ultimate Light Dirt, which gave a perfect look at the very end.
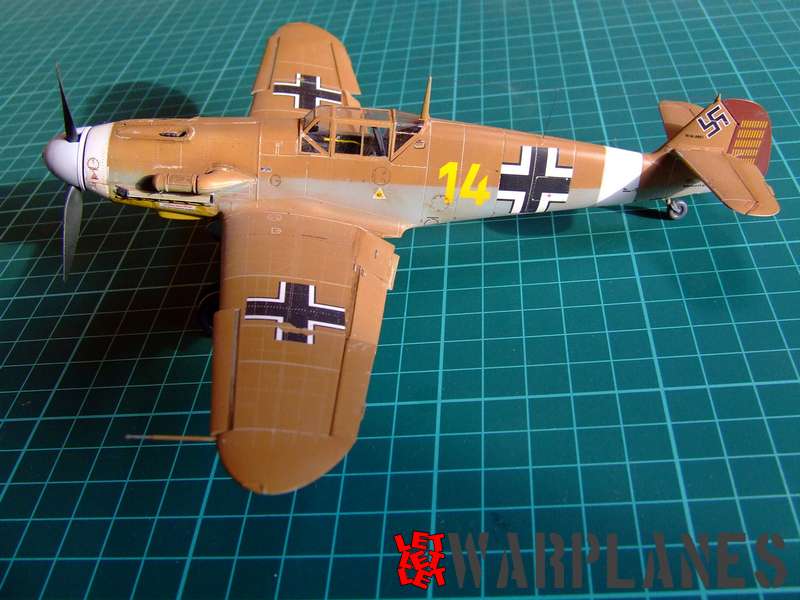
Incredible kit!!! Easy to build, very detailed, precise and with great options to build. Eduard has released more good things with this kit like Overtrees version, wheel set and etched set. All recommend to get! You can find your sample kit here and I grant thanks to Eduard for sample product!
Srecko Bradic


