Jakt Viggen Tarangus
There are not many kits of the JA-37 Jakt Viggen and the best one we have is the kit in 1/48 produced by Tarangus. It was delayed a bit in its release and finally it became available at the end of 2014.
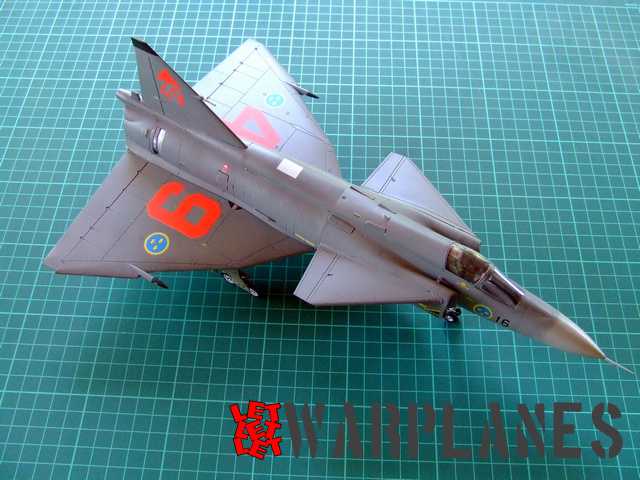
From the box cover to the last modeling bit, this is an impressive kit. The box art presents two grey machine during the patrol and the box is a big one. Inside are the assembly instruction, paint instruction, decals, and several frets with plastic parts. All parts are so precisely made, the result of careful 3D design. The build starts with painting and assembly of the cockpit. The manufacturer provides all parts in good shape and in basic form. There are no etched parts for pilot seat or instruments so you need to add some extra parts to provide some more authentic details. The instrument panel is very well made (there are two in the box, one with old instruments and another is the upgraded version) and my only point is that the manufacturer could add decals for the instruments.
The fuselage is of a bit complex shape. It is made from top and bottom mid section assembly parts as well front and rear assembly sections. Much care has to be taken by less experienced modelers as all parts must fit perfectly to make assembly precise. Maybe the most important section to assemble is the intake duct, it is mounted on the mid section and this provides the join section for the rear fuselage. My advice is to make dry run before joining all sections into one form. On the bottom of the fuselage is the empty space where you need to place wings. There is no special attention about this; it goes smoothly and precisely into place.

Landing gear is maybe one of the most complex landing gears I have ever built. The nose gear is an easy one but main landing gear consists of the main leg where is attached a dozen of small elements such as wheels console (or how it is called), various retracting cylinders as well as connectors. No matter that it look a bit scary when you see it in the instruction, it is easy to assemble it since parts positions are easy to find and to cement into the proper place.
External fittings include under fuselage and under wing pylons as well as various air vents on fuselage. For the last elements in assembly I have put the seat inside and closed cockpit with two parts canopy. This is good to mention that it has the option to make it with open canopy.
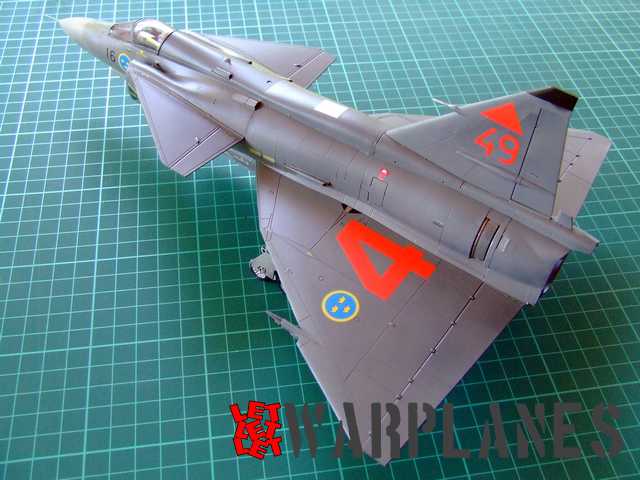
Painting instruction provides very interesting subjects, maybe most interesting and challenging could be ‘field and meadow’ camouflage with various greens at the top and blue at bottom and a few samples in grey camouflage. In the first moment I wanted to make green camouflaged sample but I changed my mind and decided to make it in fighter camouflage grey scheme and hope they will release one day the ground attack version and this one will be made in the other camouflage.
Decals are provided for all details on kit and no matter they are so many, you need not more than a few hours to complete them all.
Excellent kit! I am sure there are update sets which can be used to enhance this excellent kit and with some care it can be built into a very attractive kit. This kit is definitely highly recommended! My great thanks go to Tarangus for sample kit.
Srecko Bradic

