Eduard MiG-15
After some troubles and delays, Eduard has finally released their kit of the MiG-15 in 1/72 scale. When I opened the box and viewed the content inside, I have to say that the year 2014 is off to a great start! The very first kit comes as ProfiPack and the version inside is MiG-15bis.
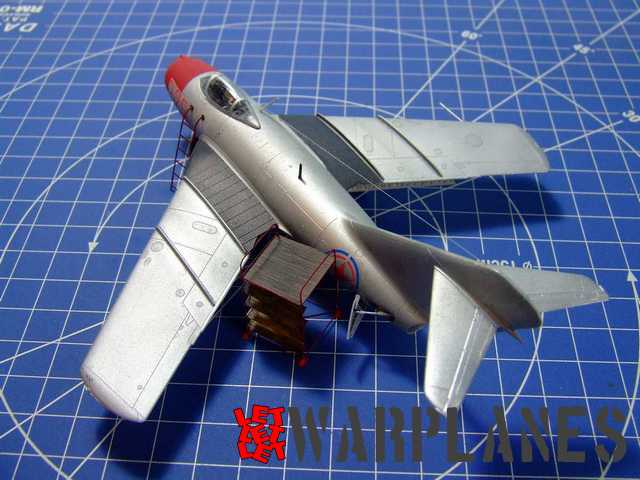
The kit stock number is 7056 and it is a very simple but detailed kit. Main kit parts are provided on four plastic frets (one of those transparent), there is also sheet of etched parts (with painted elements) and protective masks. Decals are perfectly printed and include markings for Korea, Soviet Union, Cuba, Egypt and East Germany, a very good selection from the very start. Surface details on the kit are very precise and assembly instructions are very good as usual.
Most interesting to note is that before this kit became available, Eduard had released detail sets for this kit, so this review will include most of them. To use them all in build you need some precision planning. So here is my way to do…
Air Brakes
Brassin set for air brakes 672 020 includes four resin parts and eight etched parts. If you decide to use it, you must include them first in the build, before fuselage halves are joined together. Note that inside fuselage are air brake indentations the shape of the brakes bay, so you have to open these. Very simple way is to take engraving needle and to scribe inside corners of the bay until you open it. This will result in a very sharp hole. The brake bay is made from two etched parts, one creates a wall and this is made by one part which is bent to shape and bottom cover. I will advise to do this section just until you create bay fixed inside. No need to assemble the air brakes, better to leave them for the final steps of assembly, extended brakes could make trouble during work on kit and can be damaged.
Cockpit
Cockpit Brassin set 672 024 includes ten resin parts and small etched sheet with painted elements and it is greatly detailed. Assembly goes fast and the parts are very precisely shaped. Part I must specially point is the R5 and R6, you must take attention when sanding extra resin and shape it to a good match because from their assembly depends later fuselage assembly. So make a few dry runs with the fuselage before assembly. The cockpit set build-up needs to be completed before fuselage assembly. Please note that on the resin part R5 are two pipes. They are precisely molded but very tiny and fragile. It is not a problem to clean up resin base under them but for less experienced this could be a problem so you can replace them with thin wire. I have painted all parts while they are still on their bases; it is far easier to paint details and then assembly them all. During the work I wanted to test whether the original etched instrument board could be used in conjunction with the resin cockpit parts and I find it is not possible. The reason is simply that the etched instrument board and resin panel does not match in shape. So I continued regular work and used the resin board and I have applied instrument decals from the kit decals sheet. Setting all cockpit elements in place goes so easy, Eduard did perfect work there. Please put the weight in the front section of the cockpit. One detail I will also point is to the etched parts PE6 and 7, instructions suggest to put them inside the cockpit wall when the cockpit is completely assembled but I think it is far more easy to put them inside before assembly.
Kit Assembly
When the brakes and cockpit are completed, you can continue with the fuselage/kit assembly. Assembly is easy and this is thanks to the absolute precision of the parts. First thing needed to do is the dry run of all interior resin sections, to see how they are set in closed fuselage and after that fix the vertical rudder in place. Then continue on with fuselage halves assembly. During assembly please note that there are two pins in the front bottom fuselage hole and resin cockpit must set on these two pins (they hold it in proper position). Also take attention that front edges of the cockpit section must be aligned with edges of the fuselage!! After that you have to close bottom of the nose with the plastic part C1. Originally designed to match with plastic parts, this pin have no any role in the assembly with the Brassin cockpit. When you close all of this the rest of the cockpit assembly can be completed, resin and etched parts which are placed behind the pilot head. There are some issues- when you complete rear resin and etched parts you have arranged the cockpit to be finished with a closed canopy. So you need some changes in steps if you want open canopy.
Regarding to the main instruction assembly, next to go is the wing assembly but in our case next to go is…
Flaps!
Under the number 72 574 is Eduard product MiG-15 landing flaps. No matter that they look a bit tricky; they are in fact easy to use. All parts are placed in one small sheet and they are not painted. But first of all you need to cut bottom flaps line on the wings and do some surface sanding inside wing top surface. Then cement wing halves. Cut off inner structures of the wing, bend the PE flap wells and place in the slot. Take a note that ribs are tiny so you need extra care went bending and cementing in place (use small amount of cement). In the continuation of the flaps work, you should arrange flaps but I recommend leaving fixing to the wings for later, in final assembly before painting.
Exterior Set
The exterior set is very interesting as well as it combines parts which are of use for the same kit but also various accessories. This set has stock number 72 575 and use is very simple! The right moment to start using it is when you fix the wings and tail on the kit. Landing gear are on the highlight there and I have replaced actuators on the front doors, added structure and wirings in the main landing door bay, replaced main doors with etched ones and the result is great. Most important is that work goes fast and there is not observed any problems with parts positioning. Alongside with application of the etched parts, I have cemented landing gear parts as well as small details like cannons and probes on wings.
Before painting
As you note, I have skipped some steps during the work and let them for the late assembly stage. What is next to do is the kit painting but before some thing have to be completed and arranged. I must note that in this stage of work the kit spent most of the time in upside down position. The reason is very simple- I did not cement wheels as it would be a problem later to paint them and because the landing gear doors made of etched parts are sensitive and it is important to avoid contact with surface. So, very first thing to I did was to cement the gun sight in the cockpit and then placed the mask on the windshield and sliding canopy. After that I continued with flaps, they are similar construction as the flaps interior but have also additional hinges which are cemented and bent to appropriate angle and then cemented at the bottom. There must be care taken as it demands very tight handling to cement flaps on its tiny points. And after that kit is ready for painting.
Painting
All sample machines provided in the kit are natural metal and from the very start I decided to build the machine flown by Yevgeny Pepelyaev. He was a great ace from Korea and this kit build comes one year after this pilot has died. Specific to his airplane (as well as some others) is that the nose was painted in red. There are two options of painting, in first version red surface was tight to the nose numbers and after battle damage repair the red area was a bit away from the nose numbers. I also made some panels variation and also painted walk way area on the wing roots in black. After paint was dry, I applied a coat of gloss varnish and set the decals on. Since it had no stencils, placing of decals passed very fast.
Final
And for the very last work I spent more time with external elements then on the same kit. This kit required very little work, I placed wheels on the kit, sprayed flat varnish, removed mask from the cockpit, put radio wire and it was completed! During the work on the red areas on the kit I painted remaining external elements in red. That was ladders, covers for the air intake and exhaust, working platform and wheel guards. To regret I am not sure about the use of red, so beware about this. This could be also other colors too. The platform has excellent imitation of the wood surface and I have first applied black paint and then dry brush of cream and brown acryl color and got very good effect of the dirty wood. When completed I simply placed all of these elements on the airplane kit.
Kit benefits
If you get this kit you will not get rich, Eduard will get rich and you will for sure experience great pleasure when discovering how this kit is simply designed but very detailed and easy to build! I have built kits of others manufacturers before but definitely they could not compare with this Eduard kit. I give top recommendation to this kit as well all available products!!! You can find them all on the links below:
MiG-15bis | Landing flaps | Rocket pod | Brassin cockpit | OFAB-100 | Airbrakes | Ejection seat | Wheels
Big thanks to Eduard for the sample products!
Srecko Bradic


