Bf109E-1 from Eduard
Sad but true: Eduard’s latest kit of the Bf 109E-1 in 1/48 failed my expectations in regard to its accuracy. The kit I am reviewing now (Eduard product code 8261) was delivered as ProfiPack, the regular method of new kit deliveries from Eduard.
The kit comes in a large, tightly packed box with nice art on the cover. In the box you’ll find four sprues of grey/brown plastic, one fret with transparent plastic parts, two sheets of etched parts (one painted), one quick protective mask and a nice assembly instructions booklet plus two sheets of decals.
The assembly of the kit is quite easy and the parts almost fit on their own – very precise molding work! At first, the cockpit needs to be assembled as it needs to be painted throughout with the RLM 02 colour as the base colour. Detailing is great thanks to the excellent quality of the etched parts. The next section to be assembled is the engine compartment. And there we have the first problem.
The same kit is designed to be assembled with engine cowlings open and the engine itself is a nice piece of engineering. The problem is the that many modellers prefer to assemble the kit „buttoned up“ keeping cowlings, hatches etc. closed. (Vis-à-vis to those who prefer to open all possible access panels on a kit.) So, if you try to close the engine cowlings this is not possible. Assembling the kit without the engine is not possible as it holds the exhaust stacks as well the propeller shaft. So, I find it sad that I had to cut off the upper half of the engine; after that the engine cowlings fit perfectly.
The fuselage is too long by 4 mm, and this is too much in a 1/48 scale kit of a relatively small airplane. How that could be happen after tons of published materials, available blueprints, manuals and preserved airplanes, is hard to answer. The entire rear section of the fuselage looks like it was simply stretched back. The vertical tail is fine in shape, though, and the errors with the shape and dimensions of the wings are tolerable.
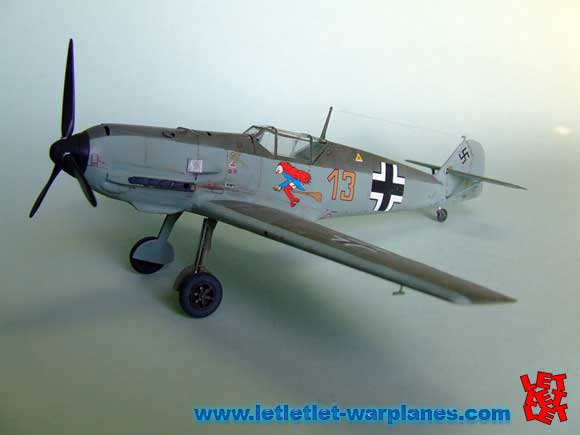
Initially I wanted to make the plane as flown by Hptm. Hannes Trautloft but as I noted that fuselage markings are a bit larger than called for and the shape of the camouflage pattern is not as on the actual airplane, I decided to make the first machine proposed in the instructions and that was the plane flown by Ofw. Kurt Ubben from the 6.(J)/Tragergruppe 186, March 1940. One thing I noted in the decals is that Eduard suggested to use the unit symbol, a witch flying on a broomstick. This symbol was removed in the winter of 1939/40 so this could not be seen in spring as instruction propose.
The kit is painted in base RLM 65 colour with the top side splinter camouflage in colors RLM 02 and 71. The images available show that this paint has faded out and the airplane shows some degree of maintenance and operational wear and tear. The decals were set up perfectly and they are of top quality print work.
Unfortunately, due to the above mentioned inaccuracies, I cannot recommend this kit. It looks nice when completed, it is easy to assemble but this is the end of good news. I hope that Eduard realizes the importance of replacing the fuselage components with new ones and to revise the engine compartment assembly so that it would be possible to assemble it with cowling closed without the need to cut the engine in half. If you wish to buy the kit despite the aforementioned inaccuracies,
please click here!
Srecko Bradic
Thanks to Eduard for the sample kit for review.


