Eduard Super 44 MiG-21 MF
When I received that box and opened it, my first reaction was: AMAZING!!! So little parts, but so fine and well-detailed and a splendid decal sheet!
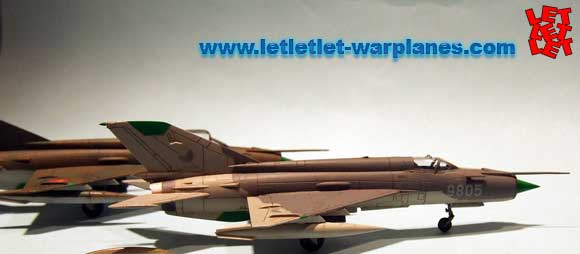
The box contains two kits; I was decided to build one in East German version; for the second I’ve hesitated and finally opted for a “modern camo” Czech deco.
The parts are very fine and tiny. So tiny that I’ve broken one canopy … Reparation was made of course but it’s slightly visible (not too much given the size) – I have to insist of the fact that Eduard is not responsible, I’m guilty: too much pressure with the fingers…
To be noted that the nose antenna is provided in two exemplars (four for two kits). Good idea because to remove it from sprue asks for attention and patience (I’ve not broken those antennas; having broken one canopy some minutes ago let me very careful).
Then, I’ve airbrushed white primer on all the interior parts followed the interior color. I followed the instructions from Eduard: 60% Gunze H25 + 20% H26 + 20% H35… That gives a really nice paint!
I’ve masked the fuselage interior, for next painting phase that is Neutral Grey and a little bit of green. I must say that I was intriguated by the fact Eduard ask for painting in Gunze H308 (grey). So I verified on their site, the instructions for their 1/48th scale kit that recommends H26 green… I preferred to use H26.
I have also placed a drop of the cockpit interior color on the protuberance of the canopy from the kit I will build “open”. I have assembled the instrument panel on the floor; put a little bit of Citadel Colors Boltgun Metal on the train and, finally, grey on the seat.
Next phase was airbrushing of steel; then paintbrushing of grey in the front wheel compartment;
Placing of the cockpit elements and the nose cone. Half fuselages were glued; seat and interior of wheels compartments placed. Then I’ve assembled fuselage with wings and ailerons; the canopies; armament supports under the wings and I used a little bit of putty: when I made dry fitting tests, the cone fitted well in the fuselage without any jointure; but the simple thickness of the paint provoked such a jointure… Sanding was easy and smooth. Then, some masking, and antennas are placed and White primer airbrushed: I have used my Evolution airbrush; more comfortable than the Badger.
Emerald green was airbrushed. Very few paint to airbrush due to the size, but so easy with the Evolution… After having masked the emerald green, I’ve airbrushed white again, for a better homogeneity of the painting. Then it was the turn of the exhaust with silver and gun metal.
For the undersurfaces, I have airbrushed Gunze H417 for the German MiG; and H305 for the Czech one then I protected the glossy H305 with Pébéo matt varnish, and undersurfaces of both aircrafts with Tamiya masking tape.
Then, I’ve airbrushed Gunze H57 light grey on one panel of the Czech aircraft (by mistake I airbrushed first the wrong panel… Not a problem of course; easy to correct) and Gunze H52 on the German one. As it is my habitude, each time I use glossy paint, I cover it with matt varnish. So the masking tape will not let traces on the paint – And, after masking stage, Light grey was airbrushed on Czech MiG and dark green on German one.
German -21: all the masks are removed; the minor painting corrections are made. Next step will be Pébéo gloss varnish.
Czech -21: masking tape applied; airbrushing of the dark grey. Then the maskig tapes are removed – except for the cockpit of course that have to be protected until the end of the painting phase.
Gloss varnish (Pébéo) is applied before decal setting. And speaking about decals: They came smoothly, absolutely no problem to place them on the aircrafts. Great and relaxing moment… Gloss varnish comes to seal all that nice decals on the aircrafts. After drying, I made an oil Was with Abteilung501 “Brown wash”. I have airbrushed Pébéo matt varnish, then time to glue the little parts (wheels, wheel bays, external stores) and… FINISHED!!!
That was a real funny and enjoyable build. I like those tiny birds. Eduard realised a stunning, amazing job. You can see on some of the photos that my 1 euro coin is the only thing that can prove that those kits are so “minis”… They have a terrific look and they are like real MiG’s are!!!
Eduard, sincerely, I applause you for such splendid kits! Get your sample here!
Daniel Clamot
Thanks to Eduard for sample product


