Eduard 1/72 F6F-5 Hellcat
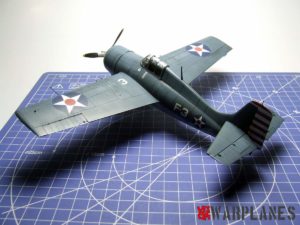
Here is the latest release of the 1/72 Hellcat from Eduard: the F6F-5 version. It’s a really nice kit, completed with photoetched parts and masks. At first look no important problem. I’ve just noted that the numeration of many of the PE parts on the instruction sheet is not correct; after PE part #12 there are practically all decaled of one number (if Eduard indicates PE#24, you have to use PE#25 instead).
I will use the two following PE sets: exterior for F6F-3 (but many parts are common with the F6F-5) and the gun bay. But for this last one the machineguns are not provided by Eduard who recommends to use Aires ones… Fortunately, I’ve found a set of those MG on eBay.
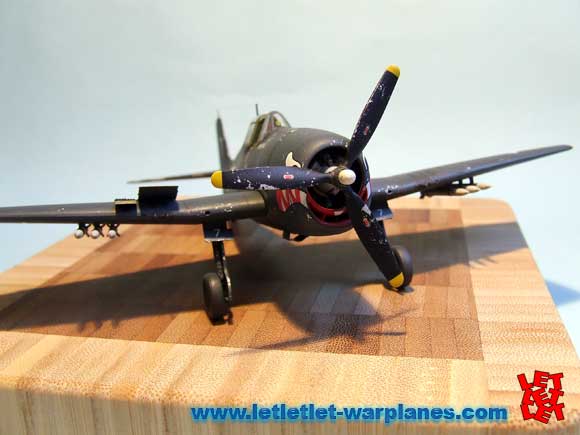
I decided to build the aircraft of the boxart. Just because I like aircrafts with so nice eyes…
I’ve prepared all the pieces that will receive the interior color.I have also worked with some of the parts of the PE set for F6F-3 exterior: in fact I can use all those parts for the F6F-5; the PE set for this last one being simply more complete. But for me, the one I own is good enough!
Well, not evident to manipulate and to form some little parts; it’s a nice challenge…
I have also removed some plastic of the half fuselages, to let the place to the just formed PE elements.
I finally placed the masks on the clear parts.
I’ve airbrushed white primer then Gunze H-58 as recommended by Eduard. Once dry, I’ve applied Maskol (or Neo) with a sponge on the parts. Once dry, I’ve airbrushed Tamiya XF-4 (yellow green) highly diluted (one part paint for ten parts thinner) Once dry (again…), I’ve delicately removed the Maskol/Neo with a Q-tip : so doing, you have a nice effect of weathering, with a paint that is, as we say in French, “very tired”!!!
Now, the instrument panels. So many little PE parts to glue… But what a great result! Stunning!!! I have placed a drop of Tamiya clear varnish on each instrument to simulate glasses.
Then I have finished weathering of some parts of the cockpit, with a drybrush of Citadel Colors “Mithril Silver” where the pilot place his feets; and I have used an aqueous pencil (Caran d’Ache “Chestnut brown”) better than to make an oil wash – That evitates to use matt varnish/clear varnish on the colored PE parts, and it’s an appreciable spare of time.
Instruments of the consoles were painted in black and drybrushed in Mithril Silver. The cockpit is really a kit into the kit, and I’m proud of the result I’ve obtained. Then I’ve worked on the tail wheel, using PE parts from the “Exterior” set from Eduard. Asked for some attention…
And the fuselage can be closed…
Now, the gun bays: the PE sheet proposed by Eduard is another “kit in the kit”!!! That will give a splendid effect when finished. First of all, the forming of the bay and glueing of a myriad of small parts… Then, using the template provided on the PE set, I removed some plastic matter.
Finally, I introduced the bay into the wing.
OK, I have to do some sanding on the lower part of the wing but actually fitting is already good. That little object have taken me 3 hours of work… And there is a second wing!
…Second wing that I will let in its pristine state. I have carefully examined the kit and (my personal opinion of course) I think it’s not a good idea to let the two gun bays open. For historical reason (crewmen did not worked on BOTH gun bays at the same time); but also for “aesthetical” ones: on left wing you will have the American Star; on the right one the opened gun bay. A second gun bay open will make an unnatural “equilibre”…
Then I’ve prepared the PE parts for the ammo boxes, and opened the ejection traps…
I made holes in the guns, glued the wings, and assembled the wings with the fuselage. I’ve used mr Surfacer as a security.
The last parts that will be used are removed from sprue. I have scratchbuilded a part; the one Eduard is providing in photoetch being too flat.
I’ve also tried to use the template proposed by Eduard for the wheel bays, but the result I’ve obtained was not satisfying enough; so I slightly modified the plastic parts.
The machineguns are ready; I Have not used all the PE elements. I can use little PE parts, but some here needed a microscope to be manipulated: too much for me…
Mr Surfacer is then sanded. During the process on sanding, I’ve broken a little element (and lost the broken part , of course…)
… But here I’ve used a technique that AFV modelers are using frequently: the acrylic 3D paint for tissue. With a toothpick I applied the color where the part was missing…
The primer revealed little jointure visible after the antenna, and a “sprue-attach location” on an aileron that was imperfectly sanded. I corrected with cyano for the jointure; sanding; and new airbrushing. In the process I broke the filter under the fuselage, but reparation took me less than one minute…
Then I sprayed aluminum paint overall. Maskol was applied with sponge. Very interesting and easy to use technique for weathering !
Masking tape is placed around the gun bay (of course, the maskol that I’ve put there will be removed with the tape so I will have to put maskol again, but it’s not a problem…) and behind the engine.
Gun bay is masked; maskol removed (for the gun bay only). I have also airbrushed white on the propeller bosse, and red at the emplacement of the “mouth”… And serious things begin in the painting phase: Gunze H54 is airbrushed! When dry, the Maskol is removed with a Q-tip and ammo bands, position lights, exhausts, other lights and tyres are painted.
Time to work on the engine: during one sitting, I’ve airbrushed Vallejo Oily Steel with a drop of black. Then followed a very strongly diluted spray of Oily Steel with Old Gold. Next phase will be the use of Citadel Colors brown ink.
Airbrush cleaning…
I’ve airbrushed yellow on the propeller.
Airbrush cleaning…
I’ve airbrushed grey on the engine
Airbrush cleaning…
I’ve partially airbrushed (another kind of) grey on the rockets. I’ve to airbrush the heads next time
Airbrush cleaning… And end of the sitting!
Next, second part of grey airbrushing on the rockets; painting of the propeller and Ciradel Colors brown ink on the engine, with a little bit of black. Masks on the propeller are removed; maskol also removed with a Q-tip. Some problem with the rockets: the paint was damaged by my little pliers. Nothing dramatic, but I had to repaint the rockets and they have to dry before I use masking tape. I definitively don’t like gloss paints…
The machineguns are finished also: the alu paint was generously covered with oil paint “black smoke”. After 1/4h, the oil paint was gently removed with (lots of) Q-tips.
Pébéo clear varnish is airbrushed. Once dry, decals are applied with the use of MicroSet & MicroSol. with a razor blade, I’ve cut the decals of the eyes and the mouth to follow the lines of the cowler.
When dry, I’ve airbrushed Pébéo clear varnish on the aircraft. Then it was the oil wash phase. I’m using “Wash Brown” from Abteilung 501.
The ammo box is finished. After that I’ve airbrushed Pébéo matt varnish. I have also removed the masks.
The last day of work, I’ve first used Tamiya pastels for the smoke fumes: black for the guns; and for the exhausts I first used black then what Tamiya names “Rust” and that is in fact a nice brown. The brown is very useful; he avoids the black to be too dark and too “hard”. And gives a more realistic result…
After that I painted clear varnish on the position lights; then glued the rockets; the wheels; the canopy (mobile part); the propeller and finally the mobile panels of the ammo box.
My daughter helped me grandly giving me one of her beautiful very dark hair, that served for the antenna…
… And yes, it’s finished now!!!
Well. I LOVE it. Eduard realized a fabulous kit, easy to assemble, fun to build. I’m really impatient to see their release of the 1/72 FAA Hellcat; that will be another great moment. Direct buy this kit here and gun bay set here!
Daniel Clamot
Sample products is provided by Jan Zdiarsky from Eduard


