Eduard Fokker Eindecker
After three years of development Eduard has released their kit of Fokker E. II/III Eindecker in December 2008. This long time has taken to observe and find all available historic and archive data as well to make design for the parts of the new coming kit. This kit is in the 1/48 scale and its item number is 8156. Kit coming with great number of plastic parts, color printed etched parts, decals for five versions and mask.
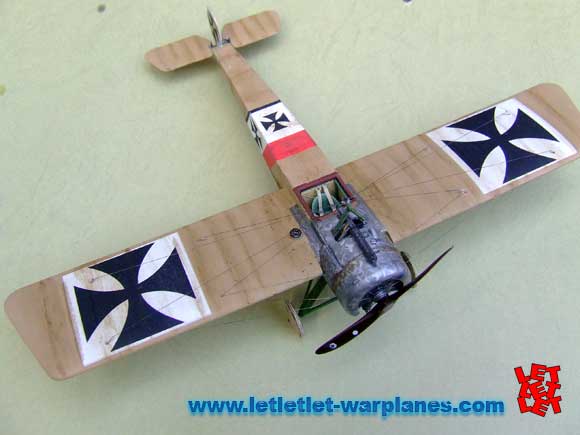
Instruction ‘booklet’ is in the top Eduard standard and include on first page brief history of the type with rest pages directed to the same model build. Important to note is that all parts is designed to be build as hi tech profi pack but also as sole cheap weekend edition with plastic parts only, no photo etched. It is important to note that kit coming with various variants of the wings, machine gun as well windshield (or not) so please take care and read whole instruction first before start build. This will avoid any mistake later in parts options. My choice was to build the plane flown by Vfw. Ernst Udet, this is painting instruction C in kit, so I consider in build only the part used for C painting scheme in instructions.
As usually al start from the cockpit and this kit is not exception. Basic construction is the floor, rear wall and two fuselage frames, all of this parts are to be cemented inside fuselage halfs. It is very important to make them completely painted as well later this will be imposible. Basic color of the interior is linen which is first to be painted. Use somed cream color, not too much liht, as well this shade on the Fokker Eindecker is know to be darker then on the other planes of the time. Note that all parts noted in instruction as aluminium, have to be made with shiny swirls over it, that was regular manufacturer process of the time.
Other paint which is mention for the color of the metal parts inside and outside of the plane is the grey green. Eduard sugest use of the German RLM 02 color and for this purpose they have sugested Gunze Sangyo color H 70. My personal opinion is that this color is much more green and I have use for this purpose Vallejo No. 090 Reflective Green. Please take this will attention and consider various available source before paint this. But I am sure that there should not be a problem even if you use proposed color by Eduard.
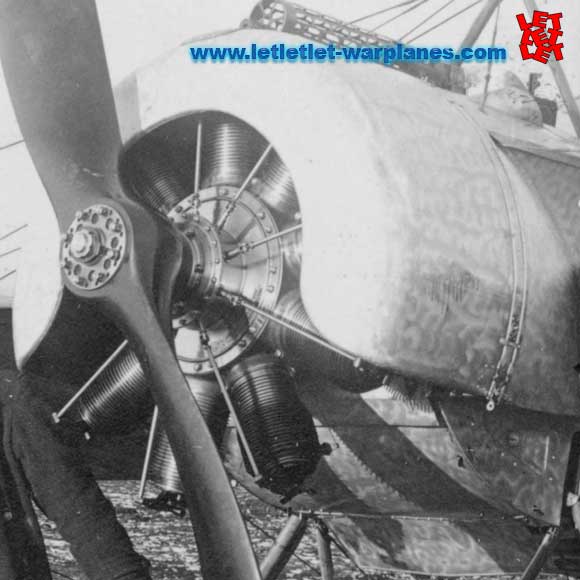
On the finished basic interior have to be fit various elements of the Eindecker interior such as construction of engine, controls, pump, seat with belts, tanks and very small instrument panel over it. Final of this work section is to close fuselage halfs into one unit. After that many parts related to the metal cowling have to be cement there but you can skip some task and leave it for later. For sure you can place later part C23, as well this is lether cover of the cockpit canopy and as well it differ much in color of the rest of the plane, you can place it on the same end of the build. But what you can not delay is the engine cowlings and they are better to be placed in this stage as well later will be problem to fit it as well wings could make problem.Only front cowling and engine can be placed later.
Exterior is also very complex construction and there is consider effort to make all in place sections like the landing gear construction with all of the number of small parts, many of them in etched parts. One special note- landing gear construction have a lot of rigging inside so do not ut wheels as suggested by instructio, leave this step for the very end of model build. Wheel in this place could make access to very small place very hard and rigging imposible.
Painting…. well, no matter that some camouflage test was made in the very early years, in most cases German planes flew in their natural fabric color. That was the case with the Fokker Eindecker- it is all in natural colors, fabric, wood, metal and some small parts in the protective green color. My choice is Vallejo color, alittle lighter then US tan used in Vietnam. Before I have brushed this color I have spray all surface with flat black spray, to se if there is any issues with surfaces or joints. All right, some corections is made and I have brushed all kit in tan color. When coat is completely dry, I have coat kit with Klear and sanded surface with 3M 2500 grit wet sanding paper to achieve very smooth surface.
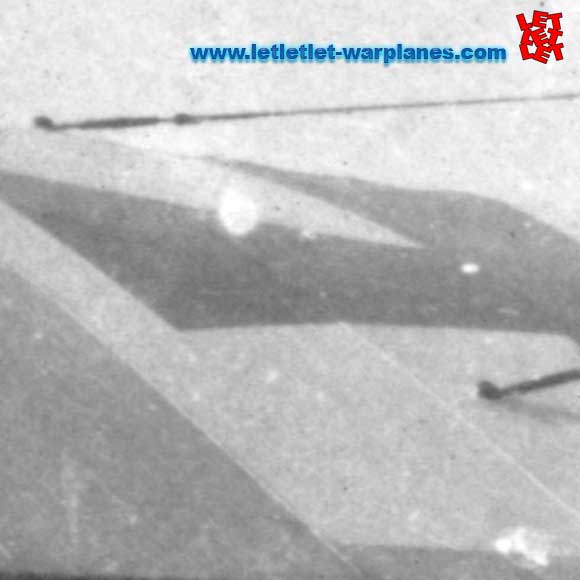
Next step in finishing is the making of the metal covers. My choice is t use Testors Metalisers and they proof very good in this role. First coat over all metal front surfaces was Magnesium, and after drying I have polished it. Then I have apply a coat of sealer. This is important to fix this coat of metaliser as well this coat is sensitive and there could be problem with work with another coat over it. When sealer was dry, I have make swirls on this metal surfaces with Testors Aluminum metaliser and I have used for this artist sharp round brush 0 size. I did not polish this swirls and I have just coat them with sealet. metal works over!
Two thin coat of Klear was brushed again and next step is the dacls for the the Udet plane. Eduard have provided excellent printed decals and I have firstly set basic national insignia over the wings and vertical rudder. Next to be made is to place Udet markings. I have to note that in kit is provided this decals and they are inclined band in red white- black- color. There will be very important to note that this colors are in many cases depend on the pilot personality. Well known aviation historian Dan San Abott state that the color in the band can not be red but blue. Udet was Bavarian and their color is blue. So please consider this if you have plan to make Udet machine.
After the final decals are set I have spray all kit with protective clear latt artsit lacquer to protect whole machine. I have repeat Klear over some emtal aeas and then I have start to wash all kit with artsit oil color. I used only one, Raw Umber. It is well known that all early engines was very wet and leaks and dispers oil all arround so the surface of the plane was alwasy dirt and with a lot of leaks. If you adc to this dirts and dust whcih imediately set on this oily surface, you can with easy imagine how this airplanes was look like. The same Udet machine is that dirst that on some places it look like it have camouflage patches, but actually it is not.
Very final step is as we all know for biplane- rigging. You must be prepared form the very start of the build for this and prepare holes in the places where the joint will be. In this small holes have o be placed Bob Bucklets turnbucklets, one excellent product for all who make early airplanes. Plant of this turnbaklets are relatively fast job and moer job and work and skill is required for the wirring of the kit. All of this wires are maybe reason why some modelers does not make any WW1 kits.
Overal view is that this kit is excellent product with great options and excellent future. I will gladly recomend it to everyone interesting in WW1!
You can join disscusion about this kit on LetLetLet Forum , 150 GCT , Burek , 12 O Clock High , Aeroforum, WIX and Aerodrome.
Sample kit is provided by Jan Zdarsky from Eduard.
Srecko Bradic



1 thought on “Eduard Fokker Eindecker”